How to Carve an American Flag
Hi friends! Today, I’m so excited to share with you this in-depth tutorial all about how to carve an American flag. If you’re into woodworking and woodcarving, you’ll know that American flags are really popular and make for a great product to sell. Want to learn how to carve a wooden flag? Keep on reading!
This project was sponsored by Inventables, the company that makes the incredible CNC machine I used for this tutorial. I’m a huge fan of the company and their machine, the x-carve, and am over-the-moon they wanted to sponsor such a helpful tutorial for y’all.

How to Carve an American Flag
If you’ve found your way to this tutorial, you’re probably interested in carving your American flag. And, you’re not alone! Carved wooden flags are super popular projects to make for a number of reasons.
Carving an American flag is almost like a rite of passage in the woodworking community. I’m in several huge online woodworking groups, and, yep, carved wooden flags always among members’ featured projects.
Flags not only show our patriotism and love of our country but also honor our veterans and service members. Plus, they’re a great home decor item if you’re going for a classic, farmhouse country vibe.
Also, ask anyone who sold their woodworking projects and you’ll hear the same answer: carved wooden flags sell. They’re super profitable and high on the list of x-carve projects that sell. Many artisans in the woodworking community ONLY carve wooden American flags and stay busy.
So let’s dig into this tutorial and walk through all the details you need to know for how to carve an American flag.
Elements of the Traditional American Flag
Okay, let’s start with something that might seem obvious: the elements of an American flag. You might think you know the American flag down pat, but trust me, I’ve seen lots of beautiful wood carves with upside-down starts and misaligned stripes.
Stars and Stripes
The flag has 13 alternating red and white stripes. These stripes represent the 13 original colonies. The top and bottom stripes of the flag are both red.
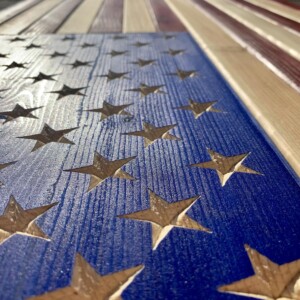
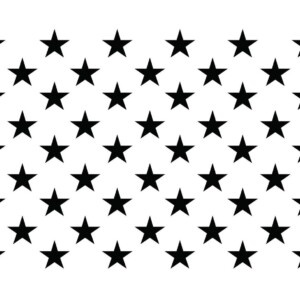
In addition, in the top left corner, the flag also has 50 white stars on a blue background. The blue part is also called the “union.” These stars represent the 50 states. The stars have five points with the tip of the top point centered in the top middle.
Flag Colors
Did you know the flag’s colors have a particular meaning?
- Red symbolizes valor and bravery
- White symbolizes purity and innocence
- Blue symbolizes vigilance, perseverance, and justice
You can see the exact shades of red, white, and blue used in the flag right here. These color references will be helpful for you later if you choose to paint your flag once it’s carved.
Flag Sizes
Typically, an American flag you’d see flying in front of someone’s home is 3′ by 5′. If want to use other dimensions for your carved wooden flag, I recommend that you use a calculator to calculate the size given your desired length or width.
This American flag size calculator is particularly helpful. It’ll also calculate for you the position of the union, stars, and stripes you need so that your flag looks right.
Choose the Right Carving Tools for Your Flag
There are lots of tools you can use to carve your American flag. From hand-carving to CNC machining, you have options.
For big wood carving projects that require a lot of precision, I prefer to use my Inventables x-carve. An x-carve is an affordable CNC machine that plugs into a computer. I often think about it like my “garage robot.” I upload my design into my computer, hit a few buttons, and the machine starts carving!
It’s great, too, for when I’m carving a project that I’ll carve multiple times, over and over again. It definitely streamlines my workflow and allows me to work on other aspects of the project while the x-carve does the carving.
That said, I’ve hand-carved many other signs using chisels and smaller rotary hand-tools. You can definitely carve an American flag without a machine like an x-carve if you’re willing to put in the labor.
But if you’re new to the idea of an x-carve, please don’t be intimidated. Honestly, I say this every time I finish a project using my x-carve: if I can do this, anyone (and I mean, ANYONE) can!
Gather Your Materials
This project really doesn’t use that many supplies! Other than the wood, I actually had all the supplies on hand, too. Let’s take a look at the materials you’d need to carve an American flag.
Materials Needed for Your Monsters Inc Wall Decor
- A project panel. For this project, I used two 1 by 6 by 8 boards from my local lumber store, glued together with wood glue.
- Wood glue. I always use Gorilla wood glue. I bought a gallon a long while back and have been slowly working my way through it!
- Clamps. If you end up gluing your boards together to make a project panel, you’ll want clamps to hold the boards steady. I use long clamps from Rockler for this.
- Wood carving tool. I used my Inventables x-carve for this project, which made it super easy and fast. You can definitely carve a wooden sign with a Dremel, too. I have a tutorial for carving by hand with a Dremel right over here.
- Cut file. You have a lot of choices when it comes to your cut file design – we’ll talk more about them below!
- Bits. For this project, I used a 1/16 down cut bit from Inventables.
- Paint. I used an acrylic paint set that my mom sent me from Amazon. It has SO MANY COLORS and I think I’ll be well-stocked with paints until I’m a grandma.
- Sanding paper. I used 120 grit paper.
- Sander. I used my little Ryobi corner sander for this project.
- Planer. I used a hand planer for this project (and really wished I had a benchtop planer.). If you don’t have a planer, try to buy wood that’s as straight and flat as possible.
Choose Your Wooden American Flag Design
First things first, you need to choose your wooden American flag design. Now I know you’re probably thinking all American flags have the same design but hear me out. You have some options.
Option 1: Carved Stars, Planked Stripes
For this first option, you only carve the 50 stars on the union. To create the stripes, you’d plank together 13 pieces of wood, using the correct dimensions you calculated with the calculator provided above.
You can either carve the stars on their own piece of wood or carve the stars through the planked stipes, painting the blue overtop the planked boards.
Here are some examples of signs with carved stars and planked stripes:

I linked each of the photos above (and the ones below, too) with affiliate links to the artists. Go check out these woodworking shops and learn more about the awesome makers. Also, if you’re a visual learner like me, it’s always helpful to see examples of beautiful finished products to learn along the way.
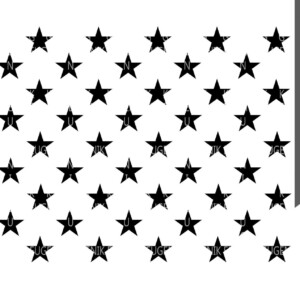
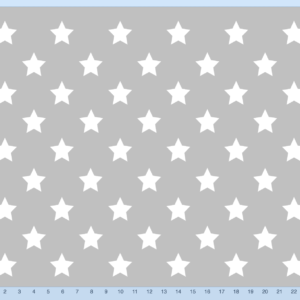
Stars Cut Files
If you’re only carving the stars, you can either create your own cut file or use one that’s already made. Below are my recommendations for cut files for carving the stars. The second one is free from the Inventables website.
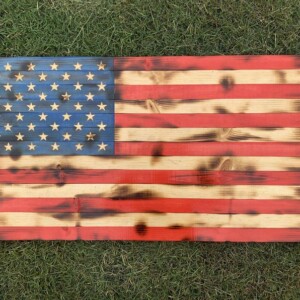
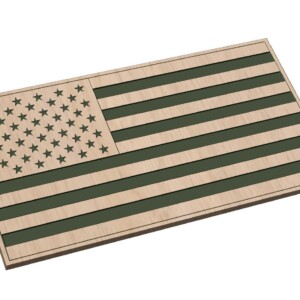
Option 2: Carved Stars, Carved Stripes
Another option you have is to carve both the stars and stripes on your flag. This is the route we took!
The benefit of carving both the stars and the stripes is that you have a little wiggle room with dimensions since you don’t need to have your stripes mathematically match your stars. The design will do that for you.
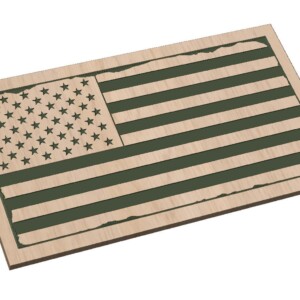
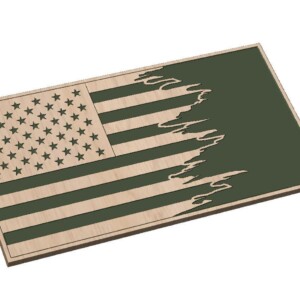
We used the distressed American flag design shown in the middle below. I purchased the design for a few bucks from Etsy (always love to support small makers!) and downloaded the cut files.
Upload Your Cut File
Once you’ve settled on your design, you need to upload your cut file. To do this, click “File,” then click “import SVG.” Resize the file to fit the dimensions of your project. Then, I always find it helpful to hit edit, then click “center to material” to make sure everything looks even.


Choose Your Bit
One of the biggest decisions you’ll need to make it which bit you want to use. Many (many!) woodworkers will recommend using a v-bit when carving out your American flag, particularly if you’re carving out the inside of your stars.
For this project, I actually chose to use a 1/16 downcut bit since I wasn’t carving the insides of the stars, only carving the outsides.

In hindsight, I should have carved out the insides of the stars, too, but I’ll talk a lot more about lessons learned towards the bottom of this post.
To choose your bit, I always first go onto the Inventables site, then sort the bits in their shop based on what I want to do (e.g., carve wood, use an upcut or downcut, etc.). This helps me find the bit that Inventables recommends for my project.
I use the “generate detailed preview” option often when I’m preparing my design for a carve. Using this feature will show you if the bit is able to cut all the aspects of the design or not. It’s also particularly helpful if you’re using both a roughing bit and a detail bit for the carve.
Prepare Your Wood to Carve
For this project, we decided to carve both the stars and the stripes together, using one big project panel for the material. To create this project panel, we had to first plank the wooden boards together.
We got 1 by 6 by 8 boards from our local lumber store and had the attendants cut the boards in half so we cut to fit them in my car. Easy!
Then, at home, we glued up the boards side by side, holding them in place with clamps until the glue dried. Now, it’s about 105 degrees right now in California, so we actually let the glue dry in the living room so that it would dry correctly. Ah, woodworking life.

Not gonna lie: this was the step where most of the issues stemmed. Not the glue-up, per se, but the boards themselves. I tried really hard to find flat, straight boards to use, but … gosh, when we glued them up, it was pretty obvious that our boards were crooked. Like, not straight at all.
We did our best to make our project panel flat using our little Ryobi hand planer and sander, but there’s only so much we could do without an actual planer. It’s definitely on our wish list for tools!
Our project panel measured about 29 inches long – just shy of the maximum length allowed on the x-carve, without using a special tiling technique to carve larger surfaces.
Here are some glamour shots of my trusty husband working his magic with the planer and hand sander. Love that man.


Carve Your American Flag
This is the best part! I love watching my x-carve do its thing. It’s so so fun to watch. This carve took a little under an hour. As always, I took about a thousand photos along the way since I love watching it so much.


The little 1/16 downcut bit was such a champion. The lines were super clean and exact and it powered through this bigger carve without any issues at all.
Finish and Hang Your Carved American Flag
To finish this flag, I painted it with red, white, and blue acrylic paints that I had on hand. I’ll probably end up staining over paint since you all know I am a huge fan of weathered, distressed looking finishes. For now though, I’m loving the look of the paint on the raw wood. So, so pretty!

In the end, we’re probably going to hang this pretty carve up outside, mounted with a french cleat on our wooden gate. Show it off a little, you know?


This carved American flag turned out so well, given the number of fumbles and stumbles we had along the way. That’s what usually happens whenever we complete a project – we learn as we go!
Let’s take a look at some of the things we would do similarly, and some of the things we’d do differently for next time.

Easy DIY Woodworking Projects & Ideas for Beginners!
Unlock your inner woodworking enthusiast with our ultimate guide on Easy DIY Woodworking Projects – packed full of ideas for beginners!
Whether you’re a seasoned DIYer or just starting out, this guide has something for everyone.
From simple yet stylish projects to helpful tips and tricks, get ready to embark on a creative woodworking journey.
Lessons Learned When Carving Our American Flag
Oh gosh, so many lessons learned along the way for the next carve:
First, we’re really considering buying a planer. Especially for big projects like these, having a planer to ensure your project panel is level is so so helpful.
Sure, we could have used MDF, which would have ensured everything was flat and smooth, but we think we’ll end up displaying this flag outside on our gate. And MDF doesn’t really work outside where it could get wet. (It’d be a great option, though, if the flag were to go inside!)
Second, next time, I’ll probably carve the insides of the stars rather than just the outline. When I carved the outline, the white part of the star got really small and kinda wonky looking. It’s not a deal-breaker since my eye goes to the outline, which looks perfectly star-like, but it’s something I notice.
If I were to carve the insides of the stars, I might consider using a v-bit, too, which would make nice sharp points on the stars.
But, again, without perfectly plane boards, a v-bit could be a challenge. So, maybe not.
Third, I might try just carving the stars and planking the stipes with small boards, rather than carving the stripes. I get why people take that approach now. You’re able to use a smaller project panel, which minimizes any issues with warping or curving, especially if you don’t have a planer.
Live and learn. In the end, I LOVE how our flag turned out!
So let me know in the comments below: have you tried to carve an American flag? How did it go? What struggles did you have or what recommendations would you give? I’d love to know!
As always lots of love from my house to yours,
Cynthia
